Learn how to round corners in SketchUp effortlessly using the RoundCorner plugin. This powerful tool adds smoothness and realism to your 3D models. My journey with sketchup started in 2005, click here to check out my journey with SketchUp. In this blog post, we'll cover the installation process, explain the three available modes, and introduce the offset value.
Install the RoundCorner Plugin:
Get started by installing the round corner plugin for SketchUp. Follow the provided instructions to set it up successfully.

Select Edges or Corners:
Identify the edges or corners in your model that you want to round. Use the Select tool and hold Shift to make multiple selections.
Modes of RoundCorner:

a) Round Corners: Softens corners with a smooth curve, great for organic shapes.
b) Sharp Corners: Preserves angularity, ideal for precise architectural or mechanical designs.
c) Bevel: Adds an angled chamfered edge, providing a polished look or clear face transition.
Adjust Parameters:

Fine-tune the rounding effect by adjusting parameters like radius or bevel size. These control the extent and angle of the roundness or bevel.

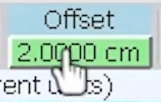
Understanding Offset Value:
The offset value represents how far the rounded or beveled profile extends beyond the original edge or corner. The plugin calculates it automatically, but manual adjustments can be made if necessary.
Apply the Round:
Click the "Apply" button within the RoundCorner plugin to see your selected edges or corners transform with the desired roundness or bevel.
With the RoundCorner plugin, rounding corners in SketchUp becomes a breeze. Install the plugin, select edges or corners, choose a mode, adjust parameters, and apply the round. Enjoy our tutorials or blogs? Check out more of our blogs here. Looking to learn more about 3d rendering? Our long awaited 14 Day Interior Rendering course launched today! For further information about the course click here.
Happy rendering!
Comments